How to Layer Cut Your Own Hair: With Video Tutorials
Table Of Content

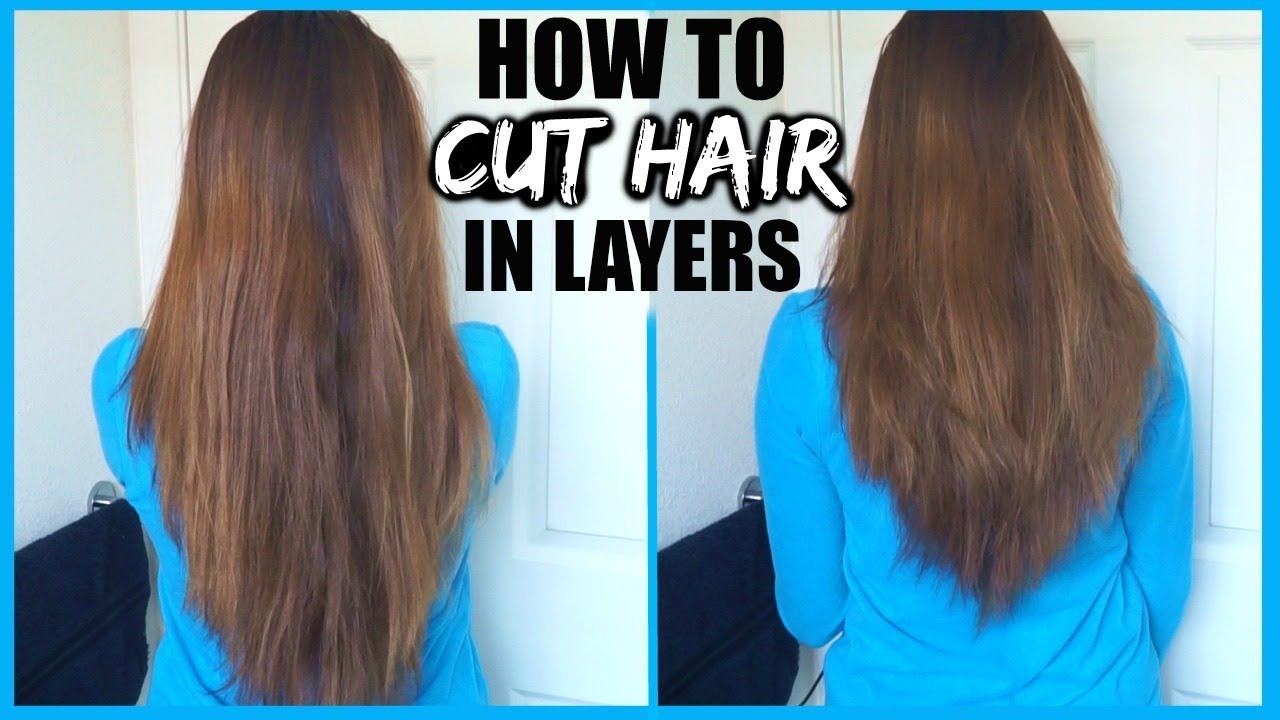
With the layers seamlessly blended, you've successfully transformed your long hair into a multi-dimensional masterpiece, showcasing the beauty of expertly executed layering techniques. In this comprehensive DIY guide, you'll discover the step-by-step process for achieving beautifully layered long hair without stepping foot in a salon. From preparing your hair and sectioning it properly to mastering the art of blending and styling, this guide has got you covered. By following these easy-to-understand instructions and tips, you'll gain the confidence and skills needed to take control of your hair's appearance. First, determine how much bang you’ll want to create and where you’ll want the sides to fall.
Many people don’t see me on the Deep Roots at Home Facebook page these days due to censorship.
Layers will give your natural curls so much definition. Play around with the length of your lob by cutting a few angled layers. With blunt ends and swishy layers, the Modern Family star's layered cut is perfect for getting a bouncy blowout. Add a little personality to your shoulder-length style by playing ever-so-slightly with the length of each strand. This look is especially great for thin or medium hair types searching for texture.
Regina Hall's Wispy Curls
While you can keep telling yourself that hair will grow back, it's better to start off slow. As Good Housekeeping put it, "cut less than you think you need to." If it's not as short as you would like, you can always cut more. You want to cut your hair either totally wet or totally dry. Otherwise the shrinkage that happens when the wet portions dry can leave you with uneven results.
Kaley Cuoco’s Feathered Feel
Amazon knocks £50 off BaByliss DIY hair cut clippers that let you cut your own hair - My London
Amazon knocks £50 off BaByliss DIY hair cut clippers that let you cut your own hair.
Posted: Wed, 27 Mar 2024 07:00:00 GMT [source]
Even a quick glimpse at the hair length chart is enough to understand that dry and wet, strengthened curly hair lengths differ drastically. This is why you can have more control over the cut results when styling curly hair before the trim. To layer short hair at home, you need a high-quality pair of cutting shears, a comb, a front and back mirror, and a towel to catch cut hair. You should also ensure that your hair remains damp (but not dripping wet) with the help of a spray bottle. Whenever your hair starts to dry, spray it with some water and run a comb through it. By the time you finish cutting your top box, you’ll be proudly looking at your first set of short hair layers.
Jennifer Lawrence's Fabulously Frizzy Curls
Dampening your hair can make it easier to cut and style, as it provides better control and reduces flyaways. Long, thick hair can weigh down a lithe face, so make like Gabrielle Union and thin out the bulk with feathered layers that fall softly around your cheeks and shoulders. Wispy bangs that melt into long, face-framing layers automatically add definition to Johnson's face. If you're looking for a fun way to jazz up a simple bob, take Lipa's asymmetrical layers as inspo to experiment with length. To achieve a classic '70s0inspired look, subtly layer the front of your hair and curl the strands away from the face for a feathered curl effect. With a chunky bang and voluminous layers throughout, Wilson's style is a great option for all face shapes.
You’ll need to repeat this combining the guide with new hair maybe three or four times on each side. Brush out the hair just released and create a center part. Part you hair like this regardless of how you part your when styled. To do that clip the top two-thirds of your hair up and out of the way.
Cover your shoulders with a towel or hairdressing cape to protect your clothing from hair clippings. This simple step will help keep your surroundings clean and make the cleanup process much easier. Fill a spray bottle with water to lightly mist your hair.
The Deep Parallel Point Cut (DPPC)
If you like to toss your hair around or switch up your parting frequently, settle on a center parting. Once you've identified and cleaned up your parting, use the edge of your cutting comb to section your hair from about half an inch behind the ears. Going slightly past the ear line should give you a bit from the back length so that you're cutting to meet the longest point of the hair. Comb the hair forward and use your clips to section off the rest of the hair. To feather the ends of your hair, a hairdresser will typically hold the hair-cutting shears at about a 45-degree angle and cut the ends of your layers. Once the hairdresser finishes, the ends of your hair will look like wispy feathers.
Leave a Reply Cancel reply
You’ll also need a few sturdy hair clasps, bobbles, and a water spray for keeping your hair damp while trimming. As I said, I am not a hair professional, but I am very happy with the cut I have achieved. For a different style, you can see my previous tutorial on how to do a wolf cut on curly hair. Split ends happen when hair becomes brittle, dry, and frayed. You can prevent split ends, in part, by using cutting shears instead of standard scissors when making layers. Then, look for choppy areas and touch them up with the point cutting technique.
Next you’ll want do a second part about a half inch off center to the right flipping that hair over to the opposite side of your head. Twist and tie off all remaining hair on the right side for now. Just realize this means you need to take extra caution not to over cut. In that case it’s smarter to cut less than you feel you need to allow for this. Oh and don’t miss the cheat sheets included which break two of the process down into a simple step by step. Truth is, while we all might like to think we can turn in our lifetime salon membership card, cutting your own hair isn’t for everyone.
Long in the front, short in the back, and razored up and in throughout. Such a precise cut would look drab if not for the sliced-up ends. My process is simple for wash days as I mention in my original post with recipes for wonderful gel and hair mask. However, one thing that has changed is I no longer co-wash and only micro-plop. My hair does best with a light wash most days with occasional co-washing to give my hair a rest.
Then, flip the ends of your hair over and begin cutting nearly parallel with the ends, but in a zigzag fashion, which will break up some of the length. The deep cut means you can go a couple of inches in, instead of just snipping at the ends. For afro-textured hair, keep your hair dry, with no products, and brush it out to its fullest. Now, trim damages and split ends of your hair without stretching any of it out with your fingers, a little like cutting a hedge. Once you’ve cut it all, brush your hair out again and trim any stragglers that are sticking out over the edges.
Then, repeat this process with the other two sections of your top box (the middle and back sections). Do your best to keep the same layer length as the front box. Layers look great in short hair, so follow the steps below to start showing off your new hairdo. “When you customize haircuts to the clients hair density and face shape it brings out the best of the hair and showcases their best features,” Rachel explains. After carving the face-framing layers, if you’re struggling to refine the ends, Sara uses ARC™ Scissors 10/10 Reversible Texturizer to remove weight as needed. “I wanted the layers to float effortlessly with the rest of the cut, so I removed weight with my ARC™ Scissors to take out about 60 percent of the hair,” Sara says.


Comments
Post a Comment